Slack Integration Setup
Step-by-step guide to connect your Slack workspace with ReplyDock for seamless WhatsApp-Slack messaging.
Slack Integration Setup
Connect your Slack workspace to ReplyDock to manage WhatsApp conversations directly from Slack threads. This guide will walk you through the complete setup process.
Prerequisites
Before you begin, make sure you have:
- ✅ Admin access to your Slack workspace
- ✅ A ReplyDock account (sign up at app.replydock.app)
- ✅ Permission to install apps in your Slack workspace
Step 1: Access Your Slack Workspace
- Go to app.slack.com and log in with your workspace credentials
- Once logged in, you'll see your workspace home screen
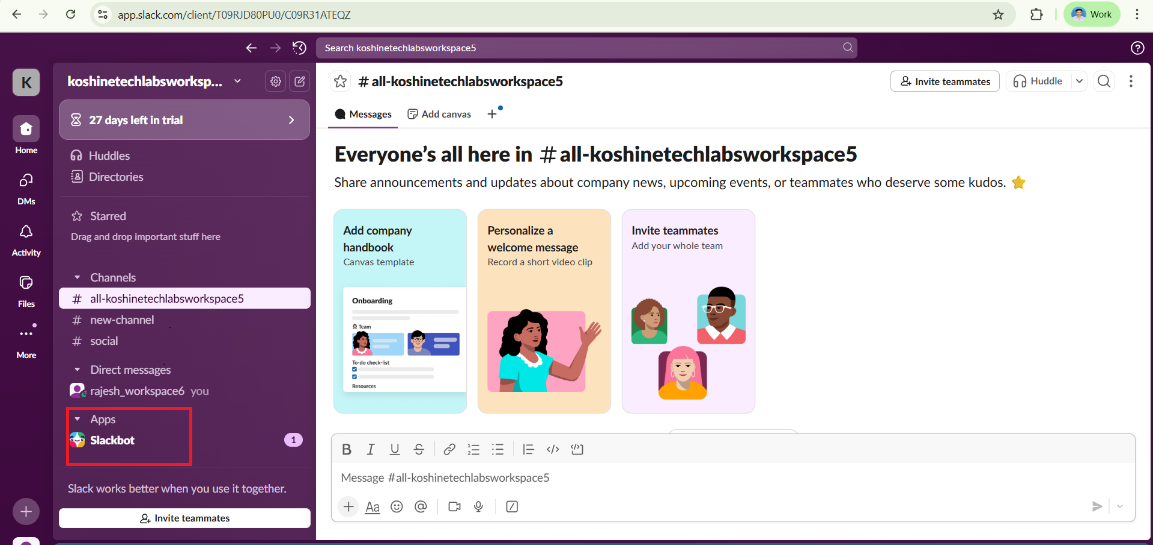
In the left sidebar, locate the Apps section — this is where all installed apps appear, including Slackbot and other integrations.
Step 2: Install ReplyDock in Slack
- Go to your ReplyDock Dashboard
- Navigate to the Slack Integration section
- Click the "Add to Slack" button
- From the Workspace dropdown, select the Slack workspace where you want to install ReplyDock
- Click the "Install ReplyDock" button
This authorizes the ReplyDock app to access your selected workspace and completes the installation.
Step 3: Verify ReplyDock Installation
After completing the installation:
- Open your Slack workspace
- Look for ReplyDock in the Apps section of your left sidebar

Don't see ReplyDock? Click the three vertical dots (⋮) next to "Apps" → select Browse apps → search for ReplyDock and open it from there.
Step 4: Add ReplyDock to Your Channel
Now you need to add ReplyDock to the specific channel where you want to manage customer conversations.
- Open the channel where you want to use ReplyDock (e.g.,
#customer-support) - In the message box, type the following command:
/invite @ReplyDock
- Press Enter

ReplyDock will now be able to create threads and send/receive messages in this channel!
Step 5: Get Your Channel ID
The Channel ID is required to link your Slack channel with ReplyDock.
- Click on the channel name at the top (e.g.,
#customer-support) - A sidebar or pop-up window will open showing channel details
- Scroll to the bottom of the window
- You'll find the Channel ID displayed there
- Click the copy icon next to it to copy the Channel ID
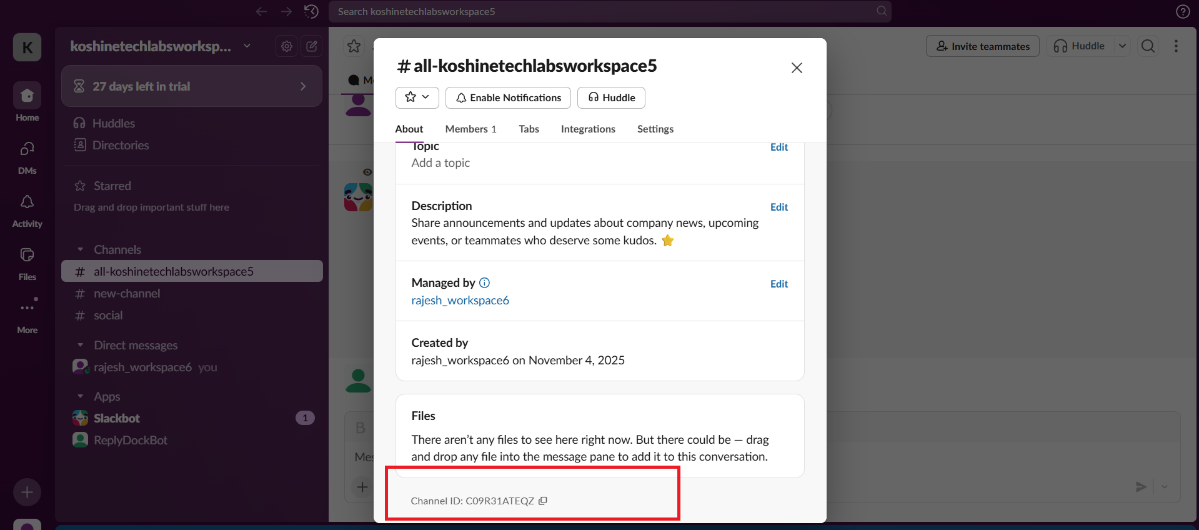
Important: The Channel ID is a unique identifier (e.g., C05XXXXXXXX) —
not the channel name. Make sure to copy the correct ID!
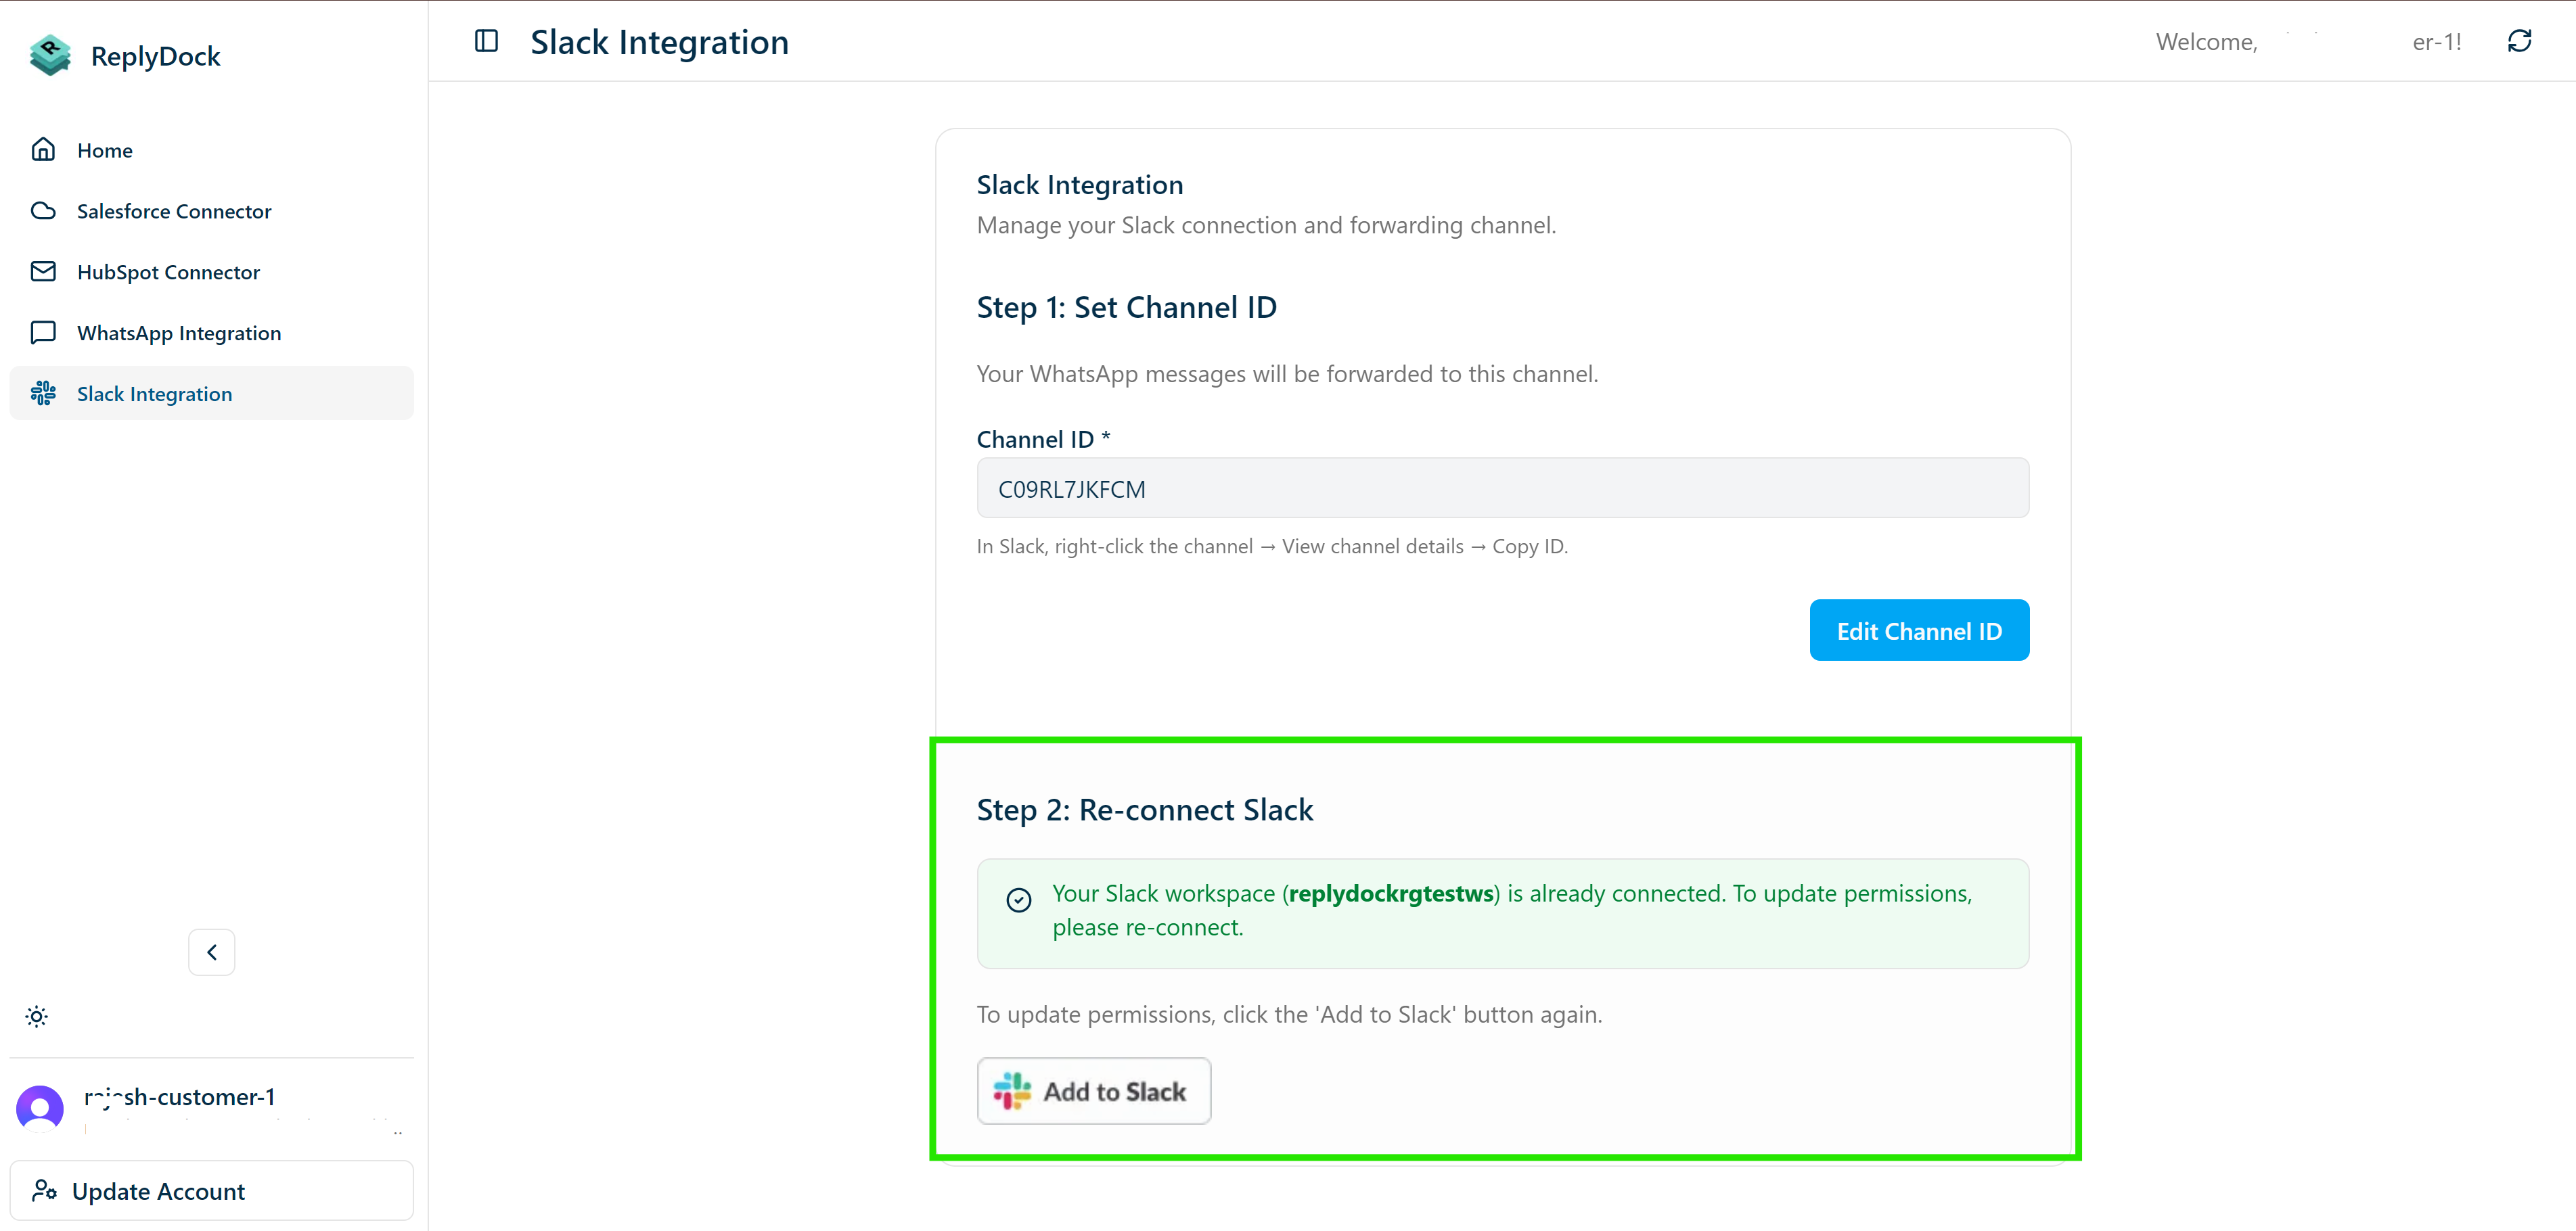
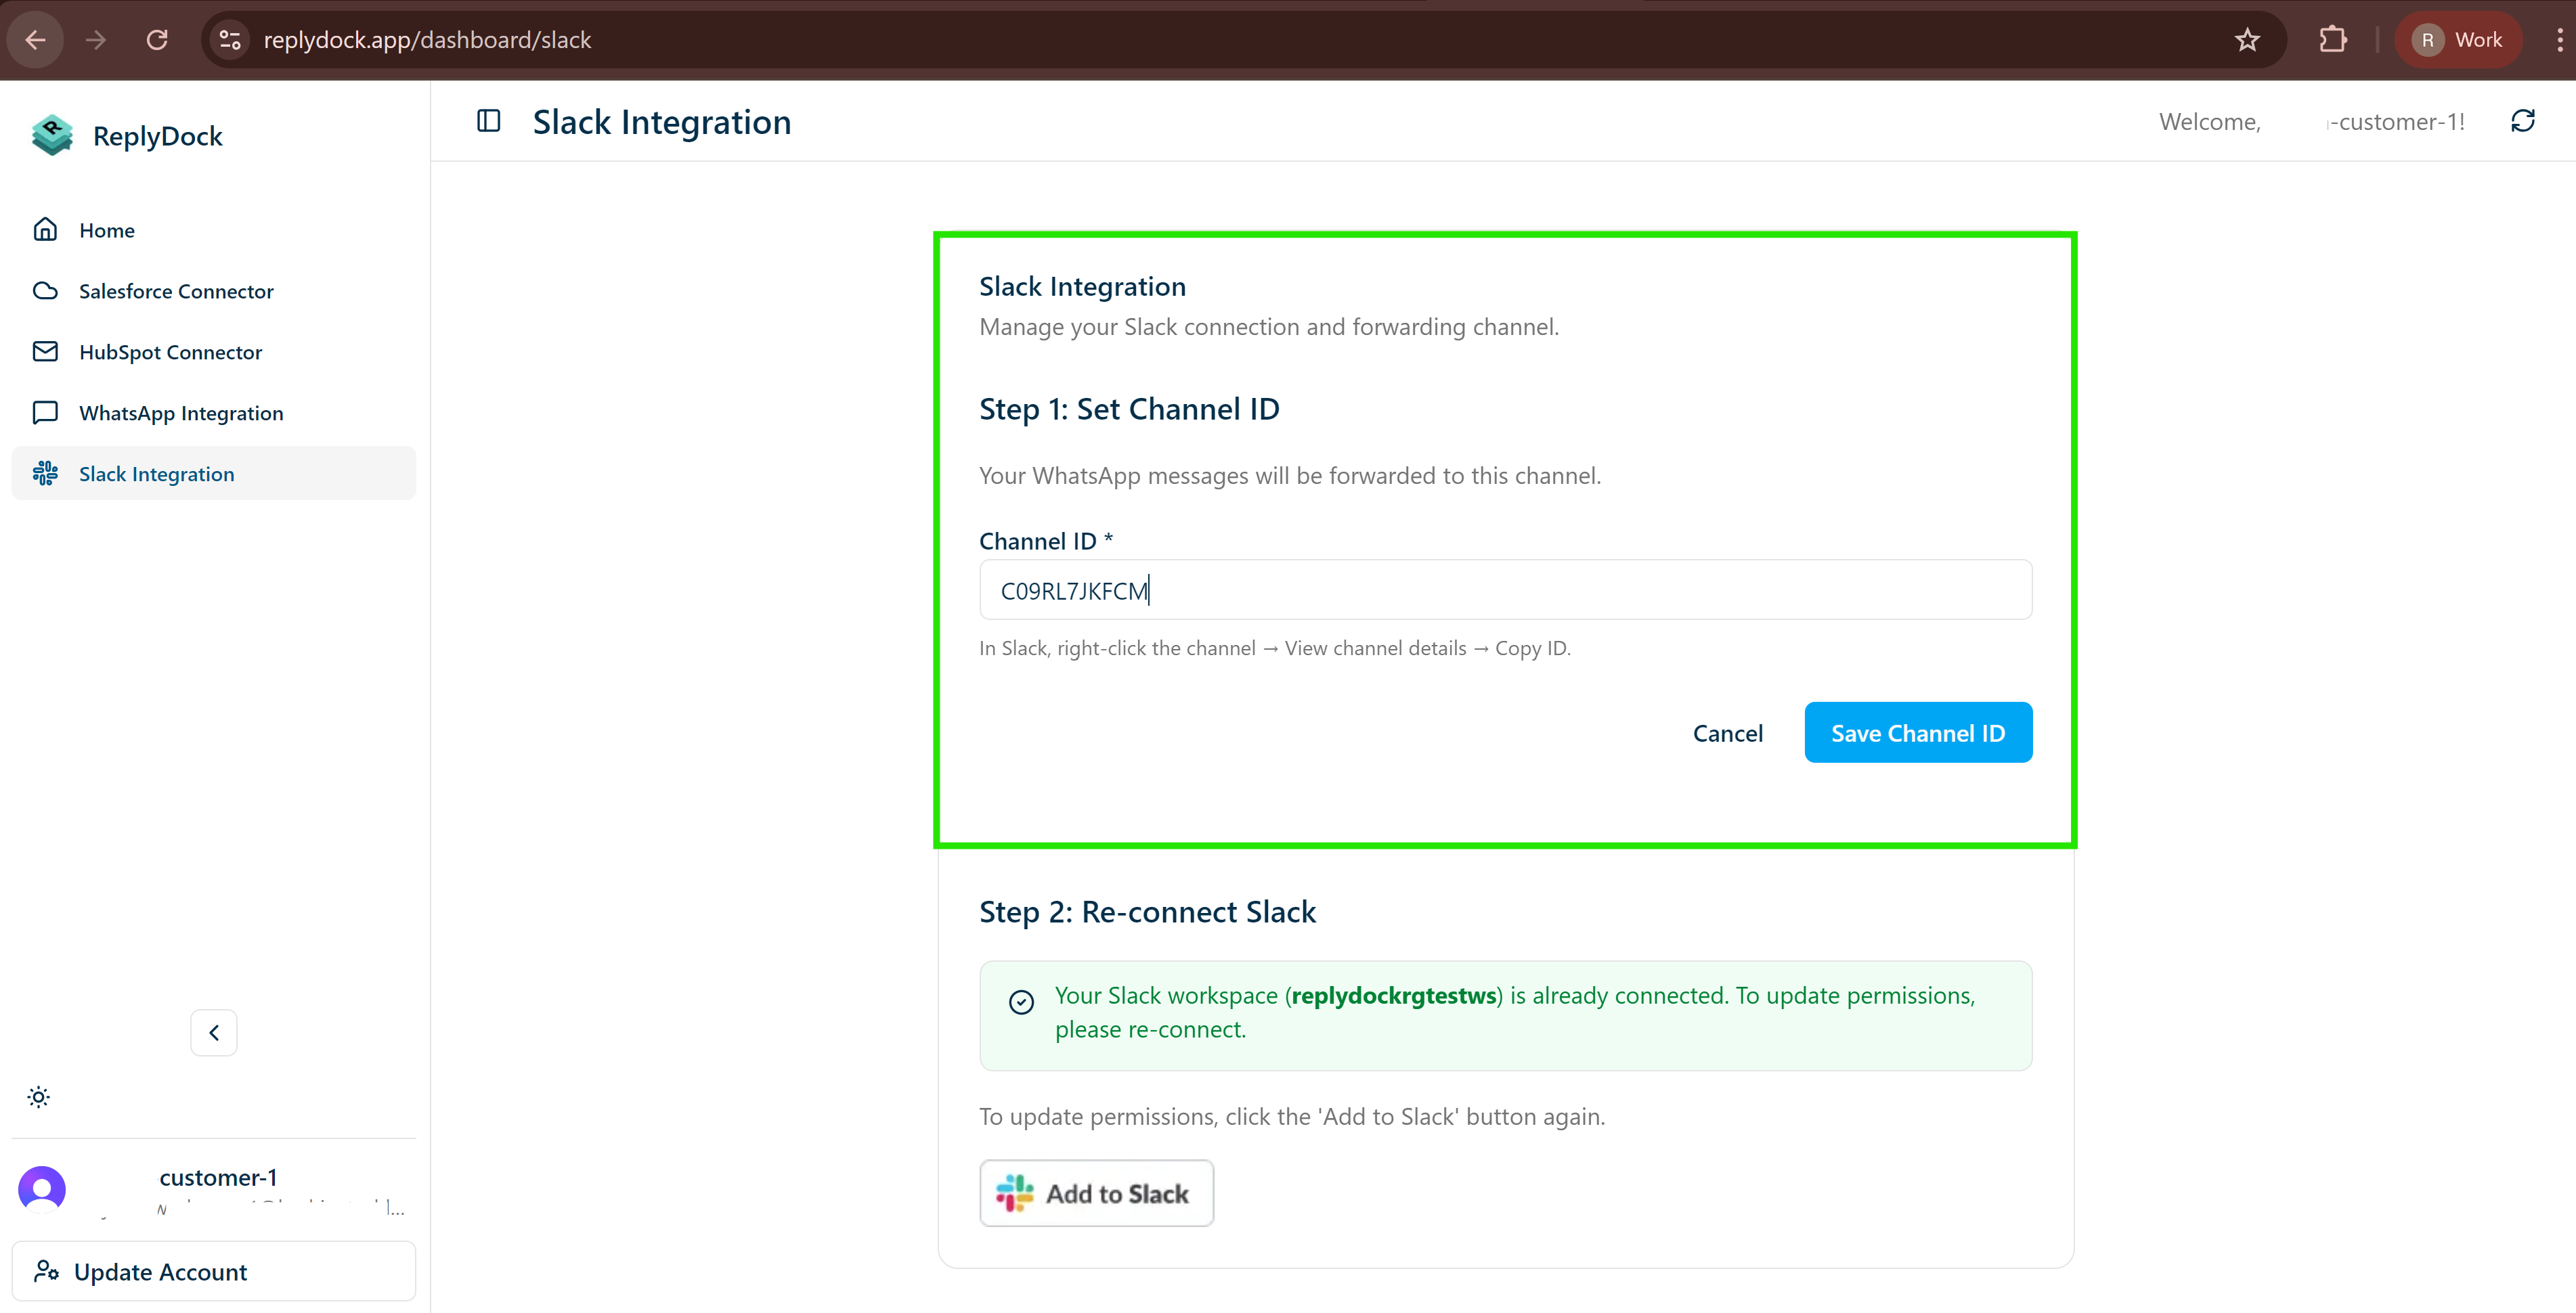
Step 6: Configure Channel ID in ReplyDock
Final step! Let's save the Channel ID in your ReplyDock dashboard.
- Go back to your ReplyDock Dashboard
- Navigate to the Slack Integration section
- In Step 1: Set Channel ID, paste the Channel ID you copied from Slack
- Click the Save Channel ID button
🎉 Setup Complete! Your Slack workspace is now connected to ReplyDock. You can now start receiving WhatsApp messages as Slack threads!
Next Steps
Now that Slack is connected, you can:
- ✅ Set up WhatsApp Business API to start receiving messages
- ✅ Learn about thread-based messaging
- ✅ Explore how to reply to customers
Troubleshooting
Can't find ReplyDock?
- Make sure you completed the "Add to Slack" installation
- Try searching for "ReplyDock" in your workspace's app directory
- Contact support if the bot doesn't appear after installation
Can't invite bot to channel?
- Ensure you have permission to add apps to the channel
- Try using
/invite @ReplyDock(with the @ symbol) - Make sure the bot was successfully installed in your workspace
Channel ID not working?
- Verify you copied the Channel ID (not the channel name)
- Channel IDs typically start with "C" followed by alphanumeric characters
- Make sure there are no extra spaces when pasting
Need More Help?
- 📧 Email us at support@replydock.app
- 📖 Check our FAQ
- 💬 Visit our Support page
Security & Permissions
ReplyDock requests the following Slack permissions:
| Permission | Purpose |
|---|---|
app_mentions:read | Detect when you mention @replydock to send messages |
channels:history | Read messages in channels where bot is added |
chat:write | Send messages and create threads |
commands | Support slash commands like /rdinit |
users:read | Display sender names in confirmations |
ReplyDock only accesses channels where the bot is explicitly invited. We never read messages from other channels.
- Enter your app name (e.g., "ReplyDock Bot") 4. Select your workspace 5. Click Create App
Adding Bot Permissions
- In your app settings, navigate to OAuth & Permissions
- Scroll to Scopes → Bot Token Scopes
- Add the following scopes:
chat:write- Send messages as the botchat:write.public- Send messages to channels without joiningchannels:read- View basic channel informationchannels:history- View messages in public channelsgroups:read- View basic private channel informationgroups:history- View messages in private channelsim:read- View direct messagesim:history- View direct message historyusers:read- View user informationusers:read.email- View user email addresses
Installing the App to Your Workspace
- Navigate to Install App in the sidebar
- Click Install to Workspace
- Review permissions and click Allow
- Copy the Bot User OAuth Token (starts with
xoxb-)
Adding Tokens to ReplyDock
- In ReplyDock, go to Settings → Integrations → Slack
- Click Advanced Configuration
- Paste your tokens:
- Bot Token: Your
xoxb-token - Signing Secret: Found in Basic Information → App Credentials
- Bot Token: Your
- Click Save Configuration
Step 4: Configure Channel Routing
Set up how messages from Slack channels are handled:
- In ReplyDock, navigate to Settings → Integrations → Slack → Channel Routing
- Click Add Channel Mapping
- Select a Slack channel from the dropdown
- Choose routing options:
- Auto-assign to: Select a team member or use round-robin
- Default tags: Add tags automatically to messages from this channel
- Priority: Set default priority level (Low, Normal, High, Urgent)
- Click Save Mapping
Repeat for each Slack channel you want to monitor.
Step 5: Set Up Notifications
Configure how your team receives notifications:
- Navigate to Settings → Notifications → Slack
- Toggle notification types:
- New messages: Notify when new customer messages arrive
- Assignments: Alert when a conversation is assigned to you
- Mentions: Notify when someone mentions you in a thread
- SLA warnings: Alert when response times are approaching limits
- Choose notification delivery:
- In ReplyDock: Browser/app notifications
- Via Slack DM: Direct message from ReplyDock bot
- Via Email: Email notifications
Step 6: Test Your Integration
Verify everything is working correctly by testing the thread-based messaging:
Test Incoming Messages (WhatsApp → Slack)
- Send a WhatsApp message to your connected business number
- Check your configured Slack channel - a new thread should appear with:
- 🟢 indicator for incoming message
- Masked phone number (e.g.,
+91 ****3928) - The customer's message content
- Verify the thread is created automatically
Example thread:
🟢 +91 ****3928: Hello, I need help with my order
Test Outgoing Messages (Slack → WhatsApp)
- In the customer's thread, reply using the bot mention:
@ReplyDockBot Thanks for your message! How can I help you today? - Press Enter to send
- You should see a confirmation message in the thread:
✅ Sent to +91 ****3928 (by Your Name) - Verify the customer receives the message on WhatsApp
Test Thread Continuity
- Have the same customer send another message within 7 days
- Verify it appears in the same thread (not a new one)
- Messages after 7+ days should create a new thread
Troubleshooting
Bot Not Creating Threads
- Verify the ReplyDockBot is invited to the channel:
/invite @ReplyDockBot - Check that the channel is configured in ReplyDock dashboard
- Ensure the bot has appropriate permissions
Unable to Send Replies
- Make sure you're using the correct mention format:
@ReplyDockBot <message> - Verify the Bot User OAuth Token is correctly configured
- Check that the bot has
chat:writepermission - Ensure you're replying in a thread created by ReplyDock
Messages Not Delivered to WhatsApp
- Verify WhatsApp integration is configured correctly
- Check that the phone number is valid and active
- Ensure the 24-hour messaging window hasn't expired (for customer-initiated conversations)
Authorization Errors
- Re-authorize the Slack app from ReplyDock settings
- Verify your Slack workspace admin hasn't restricted app installations
- Check that all required permissions are granted
Security Best Practices
- Rotate tokens regularly: Update your Bot User OAuth Token every 90 days
- Limit channel access: Only connect channels that require customer support monitoring
- Review permissions: Periodically audit which team members have Slack integration access
- Use workspace apps: Avoid user tokens; always use workspace-level bot tokens
Next Steps
Need Help?
Contact our support team at support@replydock.app or visit our community forum.